


Introduction
In The Last of Us™ Part I, stealth is more than just an optional playstyle—it's a necessity, especially on higher difficulties. The game’s hostile world, filled with aggressive human enemies and terrifying infected, demands precision, patience, and planning. But many players underestimate the depth of the stealth mechanics in favor of guns-blazing strategies that often fail under pressure. This guide focuses entirely on mastering stealth, one of the most complex and rewarding systems in the game. We’ll break down its principles, timing, movement techniques, enemy awareness, and how to use tools and the environment effectively. If you want to survive without wasting precious bullets or crafting materials, this deep-dive will be your ultimate stealth blueprint.
Understanding the Foundations of Stealth
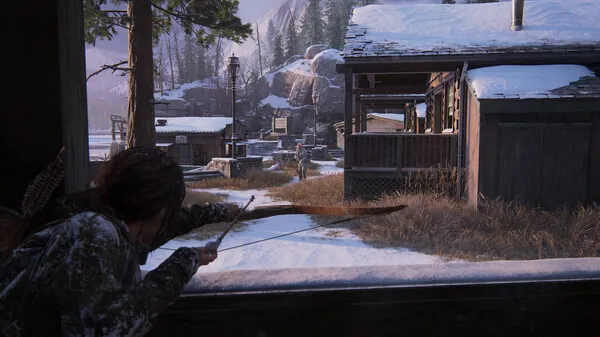
Stealth in The Last of Us™ Part I is based on line-of-sight, sound, and environment. Enemies, especially humans, rely heavily on vision, while infected like Clickers depend on sound. From the beginning, the game teaches you these rules subtly—whether it's crouching in tall grass or throwing bottles to divert enemies.
To move undetected, you must understand how visible you are. Crouching reduces visibility and sound, while moving slowly lets you approach enemies from behind. It's also critical to learn the patterns: most enemies follow patrol routes that, once memorized, allow you to time your movements. Mistakes are punished harshly, especially in encounters where enemies swarm or carry firearms.
Equally important is knowing when stealth ends. Once you're detected, enemies will call out your location or swarm you. Infected may charge in numbers. At that point, the stealth phase is over, and the dynamic shifts to combat. Stealth is not infinite—you must use it wisely and decisively.

Crouching, Listening, and Movement Discipline
The most fundamental stealth tool is crouch walking. Moving while crouched drastically reduces noise and lowers your profile, making you harder to see. Combine this with the "Listen Mode" (R1 on most controllers), which allows Joel to hear and locate nearby enemies through walls.
But Listen Mode is limited in both range and time. You need to use it sparingly and in strategic intervals. Constantly tapping Listen Mode rather than holding it conserves focus and keeps you alert to threats without breaking immersion or control rhythm.
Discipline means resisting the urge to move too quickly or stand upright, even when it feels safe. In The Last of Us, safety is almost always an illusion. Slower movement ensures you're not caught off guard. When transitioning between cover or approaching for a stealth takedown, speed is your enemy.
Enemy Typing and Behavior Recognition
Not all enemies respond to stealth the same way. You’ll encounter three major types: humans, Runners, and Clickers. Each has different behavior and detection mechanics.
• Humans rely on sight and sound. They look for movement, listen for footsteps, and call for backup. You can flank them or isolate them from their group.
• Runners use both sight and sound, but they are more aggressive and erratic. You need to dispatch them quickly and quietly, or they’ll alert others.
• Clickers are blind but have acute hearing. They track you through noise, making them deadly when approached without caution.
Recognizing how each enemy detects you is key to navigating stealth segments. You’ll often deal with mixed groups—where a wrong move alerts both human shooters and Clickers, creating chaos. Knowing who to eliminate first can save your life.
Environmental Awareness and Planning Routes
Every encounter space is a puzzle. You’re rarely meant to fight everyone head-on; instead, the environment offers alternate paths, flanking options, and verticality. Before moving, pause and scan the layout. Look for cover: walls, tables, abandoned vehicles, or debris.
Pay attention to grass and shadow. Taller grass allows for hidden movement. Shadows make you harder to spot. Use your environment to route around vision cones. Often, you'll find side corridors or broken windows that offer perfect entry points.
Also, remember: some environments are destructible or interactive. Shootable locks, movable objects, and hidden crawlspaces expand your options. Players who plan their routes using all available tools consistently find safer, stealthier ways to complete encounters.
Silent Takedowns and Their Limitations
Silent takedowns are core to stealth success. Approaching an enemy from behind while undetected triggers a silent kill animation that doesn’t alert others—unless someone sees it happen. However, this only works if you remain absolutely undetected during approach.
Timing matters. You must wait for the right moment—when an enemy is isolated, their path is away from others, and no one else has line of sight. If you're too hasty, other enemies may hear the struggle or see the body drop, triggering alerts.
Remember, silent takedowns aren’t always the best solution. Sometimes it’s better to sneak past enemies entirely rather than risk a kill. Choose takedowns only when they benefit your route, not because they’re satisfying.
Bodies, Blood, and Detection Risks
After a takedown, bodies stay in place—and enemies will notice them. A patrol may spot the corpse and go into alert mode, changing their routes or calling for backup. The same goes for pools of blood or broken glass—these are passive detection elements that increase the risk of exposure.
To prevent this, try dragging bodies out of sight when possible (though the game only allows this in certain sequences). Otherwise, plan takedowns where enemies die behind cover, in dark corners, or in rooms unlikely to be visited.
Another tip: avoid stepping on noisy surfaces like broken glass or water puddles. These may attract Clickers and alert nearby enemies even if you're otherwise hidden. Consider them part of your route planning.
Distraction Tools: Bricks, Bottles, and Lures
One of the smartest tools for stealth is distraction. Bricks and bottles can be thrown to lure enemies away from paths or even into traps. Enemies will often investigate the sound, leaving their patrol route temporarily exposed.
Use this to divide groups. Throw a bottle to the far side of a room, then move through the gap they leave. Or use a brick to attract two enemies into an area where you’ve laid down a nail bomb.
But be careful—noise also draws Clickers. If a brick lures both a human and a Clicker to the same area, they may attack each other or turn attention toward you. Distractions are powerful but unpredictable. Use them tactically.
Crafting Tools That Support Stealth
Your crafting system can support stealth when used thoughtfully. The two main items to focus on are shivs and smoke bombs. Shivs allow stealth kills on Clickers and open locked doors. Smoke bombs obscure vision, allowing you to escape or set up for a surprise attack.
Molotovs and nail bombs can be used for stealth takedowns if placed carefully and used preemptively. For instance, setting a nail bomb in a choke point before an enemy patrol arrives allows you to silently eliminate threats without direct engagement.
Don’t waste resources crafting loud or explosive items unless you intend to break stealth. Crafting items that keep you in control of silence ensures long-term success, especially when materials are scarce.
Reacting to Failed Stealth: Recover or Retreat
Even with perfect planning, stealth can fail. When you’re spotted, your options are fight, flee, or reset. The key is to avoid panic and fall back to the last safe zone or shadowed area. Sometimes, breaking line of sight for a few seconds causes enemies to return to passive patrol.
In these moments, don’t craft or heal unless you’re completely safe. Sprint to another cover spot, crouch, and listen. Once the enemies calm, you can reengage stealth. The game rewards patience, even mid-chaos.
A common mistake is escalating the conflict. Just because you’re spotted doesn’t mean you need to use every Molotov and shotgun shell. The best players regain control, reenter stealth, and continue with minimal losses.
Stealth in Set-Piece Segments: When the Game Forces Your Hand
Some moments in The Last of Us™ Part I are designed to break stealth. Forced arena fights, ambushes, or companion-triggered sequences limit your options. In these cases, stealth becomes about delaying detection rather than avoiding it entirely.
Still, good stealth work early in these set pieces can eliminate multiple enemies before the battle escalates. Every enemy you take down before full engagement saves resources. Think of stealth here as thinning the herd, not avoiding combat altogether.
Use these moments to test higher-risk moves—aggressive stealth, multiple takedowns in quick succession, or luring two enemies into the same trap. Learn to flow between stealth and combat seamlessly. That adaptability is the heart of the game.

Conclusion
Mastering stealth in The Last of Us™ Part I isn't just about staying hidden—it's about controlling every variable in the game’s dangerous world. From understanding enemy behavior and environment design to using tools strategically and recovering from mistakes, stealth gives you power without making a sound. This deep dive into stealth mechanics shows that silence is not only survival—it's dominance. If you want to beat the game with finesse, without wasting a single bullet, stealth is your ultimate weapon. Learn it, master it, and walk unseen.